

Instead of choosing unrelated creative activities each week, build a 2026 art classes to photography pathway that connects drawing, observation and camera practice around one subject. Start with materials you already have, then use a repeatable project to decide what instruction your child needs next.
TL;DR
The Garden Arts Center suits families seeking art classes within a broader dance, music and theater community.
An art classes to photography pathway connects observation, composition and light; drawing mastery is not a prerequisite.
Use one subject for a drawing and a photograph, then compare the choices behind each image.
Confirm lesson content, equipment requirements and scheduling before choosing photography instruction.
Why this matters
A child who enjoys drawing does not need to abandon it to explore photography. Both activities involve choosing a subject, noticing shapes and deciding what belongs inside an image. The materials differ; the habit of looking closely carries across.
The Garden Arts Center is a good fit for families seeking art classes alongside dance, music and theater. Its stated offerings cover children and adults, so your family's interests do not have to stay within one art form. Explore The Garden Arts Center as a starting point, then ask about instruction that matches your child's interests.
Treat this pathway as a family learning plan, not a named course or a required enrollment sequence. Photography instruction needs its own confirmation: a general arts offering does not establish that a particular camera class is taught.
Before you start
Gather these essentials before planning your first project:
Simple materials: Paper, a pencil and access to a camera or phone camera are enough for the home exercises below. Ask a prospective instructor about equipment before obtaining anything specifically for lessons.
A workable family schedule: For your 2026 plan, identify a repeatable practice window and a realistic travel window. Include school activities, meals, sibling commitments and the return trip.
Permission and file access: Confirm that you can open, save and review photographs on the device. Start with objects rather than people, and check permission before photographing anyone or sharing an image.
The easily missed obstacle is access to the finished photographs. A child cannot compare a drawing with a photo that stays on someone else's locked device. Decide where the images will live before the first exercise.
Build your starting brief
Choose the learning focus
Ask what your child wants to make. Offer concrete possibilities: a picture of a favorite toy, an arrangement of leaves or a view from a window. Let the subject come from curiosity rather than an adult's portfolio ambitions.
Write three headings on paper: Subject, Skill and Practice window. These are your planning labels, not registration fields. Under Skill, choose one focus, such as noticing outlines or leaving distracting objects outside the frame.
Set a small starting task. For example, plan a 10-minute observation session. This is a suggested home exercise, not a recommended class length or a promise about a child's attention span.
Record the starting point. Keep one drawing and one photograph of the same object. Ask your child to explain what they wanted you to notice.
Expected result: You have a subject, a single learning focus and a sample of how your child currently approaches an image.
Avoid turning this starting point into a test. A child who talks enthusiastically about shadows has given you useful information even if the drawing is unfinished. An adult beginner can use the same brief without changing its purpose.
Match the starting activity to the interest
These are learning options, not a ranking of classes or a description of any particular syllabus.
Drawing from an object
Best for: Children who enjoy pencils, shapes and making things by hand
What it lets you practice: Looking at outlines, proportions and placement
Limitation to recognize: Pencil control can become frustrating when the child mainly wants to explore images
Photographing an object
Best for: Children curious about cameras, viewpoints and visible light
What it lets you practice: Framing, background choices and camera position
Limitation to recognize: Device controls can distract from looking carefully
Drawing and photographing the same object
Best for: Families exploring both media before choosing instruction
What it lets you practice: Comparing deliberate choices across two ways of making an image
Limitation to recognize: Requires time to discuss both pieces rather than simply finish them
Choose the activity that keeps your child interested in looking. Starting with photography does not require completing a drawing course first.
Connect drawing with camera practice
Create a paired project
Choose a still subject. A cup, toy or plant lets you return to the same arrangement. Avoid a moving subject while you are learning to compare composition.
Make a drawing first. Ask your child to notice the subject's largest shapes and where it sits on the page. The aim is observation, not a polished picture.
Photograph the same arrangement. Keep the subject in place and change the camera position. Make 3 images: one from farther away, one closer and one from a different angle.
Compare the choices. Ask what entered or left the frame, which background feels distracting and where the subject is easiest to see. Compare decisions rather than declaring one medium better.
Expected result: Your child can point to a choice that changes an image, such as moving closer to remove a distracting background.
Use the same vocabulary across both activities. A subject is what the image focuses on; the frame is its boundary; the background is what appears behind the subject. These words give you a shared way to discuss the work without grading it.
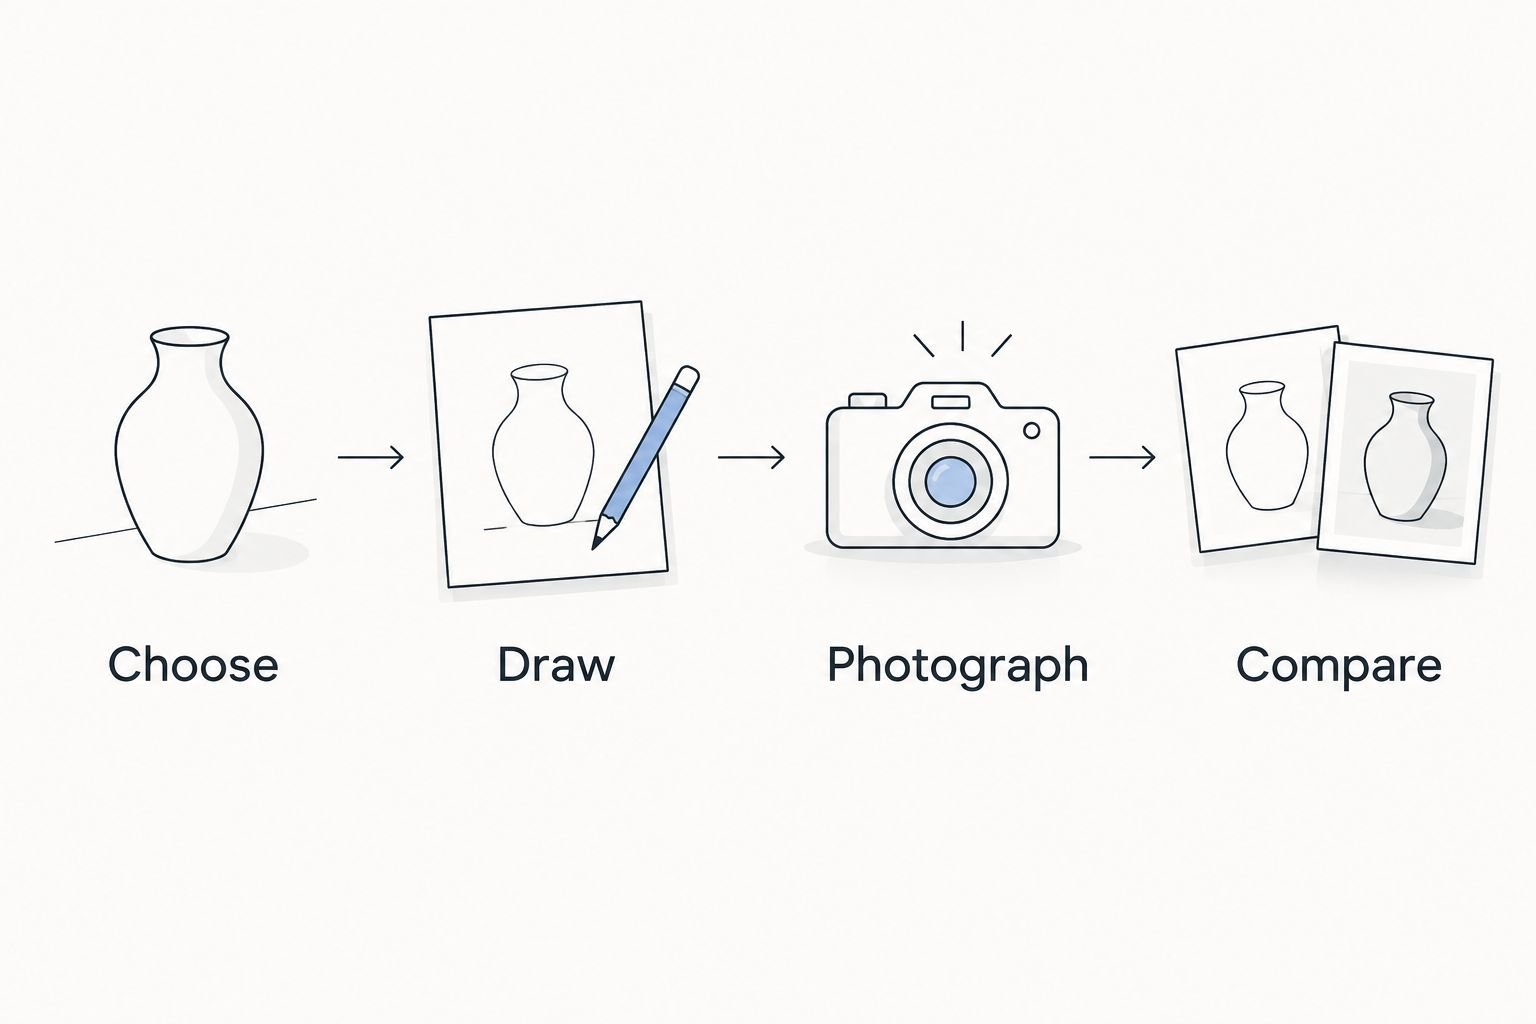
Keep the subject consistent so your child can compare the choices made in each medium.
Explore light without adding equipment
Repeat the paired project beside a window, then move the subject to a different position in the room. Notice where shadows appear and which details become easier to see. Do not look at or point a camera directly at the sun.
Ask one question: What changed when the light changed? Keep camera settings unchanged where practical so the exercise stays focused on observation. Automatic camera adjustments also affect the result, so this is an exploratory comparison rather than a controlled measurement.
For your 2026 project folder, save the original images as well as any edited versions. That keeps camera choices visible instead of mixing them with later changes.
Match instruction to your family's needs
Prepare a useful class inquiry
Describe the interest, not just the medium. Tell the instructor whether your child enjoys drawing details, arranging objects, telling stories or experimenting with a camera.
Ask what beginners actually practice. Request examples of exercises involving observation, composition, materials or camera use. A class title alone does not tell you how a lesson works.
Confirm the practical requirements. Ask about age or experience expectations, required materials, device suitability and how work is saved or reviewed. Ask directly whether photography instruction is offered before planning around it.
Check the whole weekly commitment. Confirm the current schedule and ask about attendance expectations before registering. Add travel and home preparation to your calendar rather than recording only lesson time.
Expected result: You can explain why the instruction fits your child and how it fits your week.
Families across Berks, Montgomery and Chester counties need to assess the actual journey. Whether you travel from Douglassville, Pottstown, Phoenixville, King of Prussia, Reading or Lansdale, use the confirmed class location and your likely travel period. A town name in your search does not establish a teaching location.
The Garden Arts Center offers a broader arts setting, which suits families exploring several interests. The trade-off is that a broad offering does not answer your specific questions about lesson content, camera instruction or scheduling. Use the contact page to clarify those details before choosing a class.
Ask about your next creative class
Share your child's interests and scheduling needs before choosing a lesson.
Review the work and choose the next focus
Build a repeatable review routine
Place the drawing beside the photographs. Use a screen or prints you already have access to. Keep the comparison small enough that your child can discuss individual choices.
Ask for one observation and one next step. Try: What stands out? What would you change? Let your child answer before offering your view.
Record the next focus. Write a short note such as simpler background, closer viewpoint or clearer outline. Avoid a general instruction to make the picture better.
Review the schedule after 2 weeks. This is a suggested planning checkpoint, not a learning deadline. If practice keeps colliding with homework or bedtime, reduce the task before adding another commitment.
Expected result: You have a specific next exercise and evidence that the routine fits family life.
For a 2026 learning plan, progress can mean a more deliberate choice rather than a more impressive finished image. A child explaining why they moved the camera has something concrete to discuss with an instructor. Keep unfinished attempts when they help show that thinking.
Already drawing? Start with photography and return to the sketchbook
The pathway also works in reverse. A child who already draws regularly can begin with a photograph, then use drawing to investigate what the camera captured.
Choose one photograph of an object or scene your child knows.
Sketch only its largest shapes, leaving out small details.
Compare the sketch with the photograph and identify the main subject.
Take another photograph with a clearer viewpoint or simpler background.
Expected result: Your child uses drawing to plan a camera decision rather than treating the two activities as separate subjects.
This variation suits children who enjoy photography but rush past composition. Its limitation is repetition: if the child loses interest in the subject, change the object while keeping the same learning focus. There is no need to repeat an exercise simply to complete a sequence.
Troubleshooting
The camera controls take over the activity
Return to a familiar automatic mode and one still subject. Ask the instructor to confirm suitable settings for the device before introducing more controls. Keep the exercise about framing, not finding every camera function.
Your child dislikes comparing the pictures
Replace evaluation with description. Ask what changed between images rather than which image is best. If discussion still feels uncomfortable, let your child choose one piece to show and explain.
The drawing takes the entire practice window
Limit the sketch to large shapes or let photography come first. Drawing is a tool in this pathway, not an entrance requirement. Do not require a finished illustration before your child can touch the camera.
Photographs disappear between devices
Choose one accessible folder and test opening an image before the next session. Keep original files separate from edited copies. An adult should manage sharing permissions for a child's work.
The weekly plan keeps slipping
Reduce the home exercise and reassess travel before adding instruction. A sustainable commitment is more useful than a crowded calendar. Ask about the current schedule rather than assuming a different session exists.
Customize your workflow
Keep the paired-project structure while changing the subject to match your child's interests. A child who enjoys theater can arrange objects to suggest a story. A child interested in dance can draw a pose from an agreed reference image without adding the technical challenge of photographing movement.
Do not add another class just to make the pathway feel complete. First identify the question that instruction should answer: how to observe shapes, handle materials, compose an image or use a camera. Then choose the next step around that need.
FAQ
Does my child need art classes before learning photography?
No. Drawing experience is not a prerequisite for exploring photography. An art classes to photography pathway is one way to connect observation and composition, not a compulsory sequence.
Is this an official pathway at The Garden Arts Center?
This article describes a family learning workflow, not a named program at The Garden Arts Center. Ask the center about current lesson content and whether photography instruction is offered.
Can my child start these photography exercises with a phone?
Yes, a phone camera can support the home framing and observation exercises described here. A class can have different equipment requirements, so confirm those with the instructor before registering.
What should I ask before choosing a creative class in 2026?
Ask about beginner activities, student readiness, required materials, the current schedule and attendance expectations. Confirm the teaching location and include travel when assessing the weekly commitment.
Should we choose drawing or photography if we only have time for one?
Choose the activity your child wants to return to and that fits your family's schedule. Drawing emphasizes making an image by hand; photography emphasizes choosing what the camera records.
How do I know when my child is ready for another class?
Identify a specific learning need before adding a class. Bring examples of the child's work and ask the instructor about appropriate placement rather than treating a finished project as proof of readiness.
Can adults use the same creative pathway?
Yes. Adults can use the same subject, paired images and review questions. Choose instruction around your experience and goals rather than assuming an adult beginner needs a different sequence.
One last thing
Repeat a subject before replacing your equipment. A familiar object lets your child notice what changes when the viewpoint, background or light changes. For your 2026 creative plan, keep a small selection of attempts and let your child explain the choices behind them; that conversation can guide the next class inquiry.